Sunday, June 30, 2013

Review for Performance Colors!!!

Hello everyone! So I filmed a review on these products that will be up tomorrow and I will update this post so you can go check out the video! If you'd like though I will be doing a giveaway for my 100 subscribers and you can SUBSCRIBE if you'd like by CLICKING HERE!! Thank you so much and without further a due here is the review!

CLICK HERE FOR REVIEW VIDEO

First off I wanted to let everyone know that I contacted Tiffany from Performance Colors and she decided to send me some samples to review for you guys. So thank you so much Tiffany!! All of her links will be linked at the end of this post!! :) Enjoy


So the first product I wanted to talk about is the Eyeliner Pencil by Performance Colors
The color that she sent me is in Electric Blueberry. I really love this eyeliner, it claims that it goes on soft and dries to smudge-proof, fade-proof and all day wear. This I have also found is water proof! I applied this to my lower lash line and I was tearing up that day from laughing so much and it didn't move! It stays in place and I love that. She has a lot of more colors available on her shop which will be linked at the bottom of this post!
Here is the color swatched it isn't a bright blue but more like a navy which I really like!! It goes on very smooth and I really like it a lot! You can get this on her shop (again link is at the bottom) and it retails for 6.50 and you get 1.6 grams of product!

The next product I wanted to tell you guys about that I was very shocked to receive and that is the Shadow Magnet. This is an eyeshadow primer! This is described as sheer primer for under shadows, won't smudge or budge. This is completely true and it is so light weight. Also let me just mention how sweet it smells! YUM
 This is so creamy and soft and smooth I love it and it as literally replaced my Urban Decay Primer Potion!
These are just sample sizes that she sent. The full size is 2.8 ml and it only costs 5.00 and for me im saving fifteen bucks because I used to purchase the Primer Potion.

Next is the Lip Repair:
This says that it won't separate with seasons changes and you can use this alone or under a lipstick. I really like this, it is extremely light weight I can't feel it on my lips at all but it just makes my lips sooooo smooth!
 Again this is just a sample size, for the full size you get 5 ml. It retails for 5.00, so it is very affordable! I really do enjoy this.

Next are the the Shimmer Sticks:
These are just cream eyeshadows and the texture of this are comparable to Maybelline Color Tattoos. I absolutely love these! I was thinking about doing a tutorial with these so please let me know in the comments if you would be interested!
Directions: For awesome sparkle and shimmer looks apply to upper lids. They are beautiful and shimmering!! They don't crease either and these are also waterproof!
She has many other colors on her shop but these are the 3 she sent me. Oilslick, Plum Fairies and Babycakes. My favorites are Babycakes and Oilslick.
Swatches from left to right: Oilslick - which is a really pretty deep teal blue (reminds me of a peacock!) Babycakes is in the middle and it is a light pink, rose gold shade with hints of shimmer, this a dupe for Maybelline's Color Tattoo in Inked in Pink. The final one is Plum Fairies - which is a deep plum shade.
These retail for 5.00 and you get 2.8 ml.

Restorative Lip Color:
I was so excited to try these and I can't wait to repurchase these!!! The description for these are that they feel like a balm but look like a lipstick and that is exactly the truth!
The 3 colors she sent me are Bubble Gum - a light but bright pink. Cool Pink - which is a purple based pink and Coral Pink - which is a bright coral pink more on the peach side.
Swatches from left to right: Cool Pink,Coral Pink and Bubble Gum. These are so pigmented! I love them and these are totally my colors!! ;) These retail for 5.00 and you get 5 ml of product.

Matte Cream Lipsticks:
-Hydrating Matte Cream Formula, feels great on your lips, dewey movie star look and super saturated color. Again the claims are completely true. If you were to use like a matte finish by MAC they dry out your lips sooo bad but these don't at all!!! They are very very hydrating.
I officialy LOVE matte lipsticks now, even though the only one I ever wore before was MAC Candy Yum Yum.
The colors she sent me are Buff, Petal and Juicy.
Swatches from left to right: Petal which is a really pretty light pink. Buff - which is a pretty natural color and the last one Juicy - which is a pretty coral color. They are very pigmented and very build-able.


So that is it for my review and swatches. I will be having a MAC Dupes video coming up within a couple of days! It will feature these lipsticks and they are 15.00 cheaper, I think I would opt for these, plus she has even more beautiful colors on her shop.

CLICK HERE FOR PERFORMANCE COLORS SHOP

My links:
YOUTUBE
TWITTER
INSTAGRAM

Please comment down below if you like seeing these posts and also check out my YT channel I will be hosting a giveaway!!!!

Emily

Not Your Mothers Beach Babe Texturizing Sea Salt Spray UPDATE

So back in March I posted a review on this and I did not like it. But I actually really do like it. It doesn't do exactly what it says its gonna do, but it does give some texture to my hair just not the waves it said it would give. I again LOVE the smell, I just LOVE coconut haha! I just recently finished this product up and I am going to have to go get it. Here is the link to the other post CLICK HERE. I have pricing information there as well as the link to the website! :)

Please check me out on my links:
CLICK HERE FOR YOUTUBE


Thanks,
Emily

Friday, June 28, 2013

100 SUBSCRIBERS GIVEAWAY COMING UP!

Hey everyone! So if you have never check out my channel before I will link it right HERE. I am currently at 98 subscribers and it would mean the world to me if just two more people subscribed. Now when I reach 100 I just want to show how much I appreciate you guys! I will be updating my blog with the video post and how to enter in the future, when I reach my goal. :) I am so excited and happy that there are almost 100 of you guys out there watching me! :) I am shopping around a little bit for giveaway prizes already. Hopefully I can make it to my goal soon. Just make sure you click the link to go check out my channel. I do tutorials and reviews and even fun TAG videos with my friends so if you'd like go there and request all the videos you want and I will do them for you. Well this was just a quick update I have been trying out a new brand and a video and blog post will be coming very soon!! I am absolutely in LOVE with them. :) Anyways I hope you guys are having an awesome day. I will see you all very soon and don't forget to SUBSCRIBE, because it really helps!

Love ya,
Emily :)

Wednesday, June 26, 2013

Everyday Makeup Routine

Hey guys so if you haven't already I did a Foundation Routine which I will link HERE! Also if you want to see my everyday makeup routine it will be linked right HERE. Ok so for all of the products I used it will be down below with swatches and prices! So please enjoy!

This is all the stuff that I have been using on my face for about a month now.  I really do like all of these products.

For bronzing my face I use the ELF Golden Bronzer
This is really a good bronzer for just all over the face. I really like to use this to add color to my face. You can get this at Target or eyeslipsface.com for $3.00. I really recommend this product for anyone looking for an affordable bronzer!

For contouring I use the Too Faced Chocolate Soliel Bronzer in Medium Deep
Also here I have swatched the Too Faced Chocolate Soliel Bronzer that is matte and also the Papa don't Peach blush, which is also what I wear everyday. The bronzer retails for $30.00 and the blush retails for $2300. You can find both of these at Ulta or Sephora.

For highlighting my face I love using my Victoria Secrets All or Nothing
This highlighter is so pretty. It is a pretty champagne pink and I am in love with it, this retails for 14.00 but it was limited edition and you can no longer get this in the store unfortunately! But I am still on the hunt for a DUPE!

Okay so the nest thing I will move onto is my eyebrows, for that I use Anastasia Beverly Hills Brow powder in Medium Ash.
I always use the light colored shade to fill in my eyebrows. I love this product a lot this retails for 23.00, I like it but not for the price, so I am looking for something cheaper. It really does work but I wish it was cheaper!

Then I set my eyebrows with ELF clear lash and brow gel
This retails for a dollar at Target or eyeslipsface.com and I really really like it a lot.

For eyeshadow I have been loving this quad by Maybelline Eyestudio in Copper Chic.
It is so beautiful and shimmery. It is a beautiful natural look and I love it! This retails for 7.94 and you can get this at any local drugstore. I again got mine at Target.

To tightline my eyes I use Milani True Black eyeliner pencil and for my water line I use NYX Jumbo Eyeshadow Pencil in Milk to highlight my brow bone I use the Anastasia Beverly Hills Eye Lights Matte in Camille.
On the left is a really pretty light pink almost like my skintone and on the right is Milk. The Eye lights retails for 21.00 and the Milk retails for 4.50. You can get either of those at Ulta.

For lipliner I used NYX slim lip pencil in Dolly Pink
 Also for some reason I swatched my Milani eyeliner pencil in True Black with this lip liner. The eye liner retails for 4.49 and you can get it at Target and CVS. The lip liner retails for 3.50. I really love both of these and they are both very creamy and they have a lot of pigmentation.

For mascara I use Bare Minerals Curl and Lengthen.
This mascara retails for 18.00 and I don't really think it is worth the money. It works but it dries my lashes. So I am not loving this! But it works. You can get this at Ulta or Sephora.

For my lips I moisturize them with Savex Tropical Lip Balm for Dry chapped lips.
So I picked this up when I was in Hawaii and I LOVE this but I can't find it anywhere. But I googled and I found it on amazon in a pack of like 20 for around 12.00 lol. I'm considering getting that! 

Now as for the lipstick I use is MAC's Candy Yum Yum
I love this so much. It dries matte and it is just an amazing pink! It retails for 15.00 and of course you can get anywhere that sells MAC!

As for my tools:

From left to right: 
For my bronzer I use the Bare minerals Full Flawless Face which retails for 28.00
To contour I use the sculpting brush by Sonia Kashuk that retails for 12.00 and can be found at Target.
To apply my highlighter and blush I use a stippling brush by Fl!rt Cosmetics.
To blend my eyeshadow I use a tapered blending brush by Sonia Kashuk.
To blend out my concealer I use another tapered blending brush by Fl!rt Cosmetics.
To create my outer corner I use a pencil brush by Coastal Scents.
To apply my eyeshadow base I use an ELF eyeshadow brush.
To apply my brow powder I use the Anastasia brush.
Finally I use my ELF eyelash curler! 

That concludes my blog post I hope you enjoyed! Please check out my videos and SUBSCRIBE.

Thanks,
Emily

Foundation Routine!

Hey guys! So just recently I did a Foundation Routine on my YouTube channel and I will have that linked HERE! So if you are interested in watching please check it out and SUBSCRIBE and COMMENT! Thanks so much. You guys truly mean a lot to me! Anyways without further a due here are the products that were mentioned in my video!


The first product I use to prep my face is my Neutrogena Oil-Free Moisture for Combination Skin Moisturizer.
I really do like this moisturizer, it is very light weight. But I don't like it as much compared to my Aveeno Moisturizer. This retails for around $9.99 and can be found at any drugstore, I ended up picking mine up at Target. I really do like it and it gets the job done, however I prefer the Aveeno one over this just because it really helped the tone of my skin! Overall this moisturizer is a very good one and worth the money.

Then to prime my face I use my Loreal Magic Perfecting Base
I really like this and I feel like it is a dupe for Benefits "The Porefessional" although this texture is a little bit thicker I still like it and once you have applied it to your skin you can't even tell it is on your skin. I use this to hide my pores on my cheeks and a little spot on my nose! It works perfect for that. This retails for $10.49 and again can be found at any local drugstore and as always I picked mine up at Target.

To hide any imperfections or redness on my face I use the Garnier Skin Renew Anti-Dark Circle Roller.

Yes, I use this under my eyes as well as over my face as you saw in the video. This is very light weight and I sometimes use this like a tinted moisturizer. I really like this product a lot and I really recommend it for anyone that has light skin because unfortunately they don't make this in a darker shade! This product retails for $10.99 and again can be found at any drugstore.

Now for foundation I use Bare Minerals Original Foundation in Fairly Light
I love this foundation it just gives your skin such a flawless finish and especially if you used a primer. It is so smooth to apply and you don't need that much! This retails for $24.00 and you can purchase it at Sephora, Ulta or on Bare Minerals website. I really like it a lot and to me it is worth the money.

As for tools these are the two brushes I used:
The orange brush is by Bare Minerals and is called the Heavenly Face Brush and it retails for $30.00 now mine is limited edition but they still make it in black. The black one on the bottom is by ELF and it retails for $3.00 and you can get it at Target.


Monday, June 24, 2013

NOTW

Ok so thought I would show you what my nails have looked like for the past couple of days and what I'm currently wearing. :) 

This is what I wore for about a week or so, I just love this combination! 


On my thumb and middle fingers I wore Orlys - Fancy Fuchsia, on my index and pinky I wore Orlys - Shine and on my ring finger was Ciate - Strawberry Milkshake. (Normally I use Revlons - Lingerie Pink) 

Currently I am wearing :


On my thumb and middle finger I am wearing Revlons - Posh, on my index and pinky I'm wearing Revlons - Jaded and on my ring finger I am wearing Revlons - sassy. As for the sparkly shade over top of posh I'm wearing Orlys- Mermaids Tale :) 

It's a short post but I just thought I'd share it with you! :) 

Saturday, June 15, 2013

Affordable Summer Palettes/ Trios Featuring Wet n Wild!

Hey guys! In this post I will be showing you swatches from three different Wet n Wild eyeshadow trios! I absolutely LOVE Wet n Wild trios and I thought that I would share them with you. Lets go ahead and get started!

Walking on Eggshells
I love using this palette for an everyday look! Its very pretty and natural. I also love the fact that they are vey compact and easy to travel with!
The eyeshadows themselves are super velvety. Now in this palette the crease shade isn't all that smooth but it has amazing color pay off the texture just isn't there for whatever reason! These retail for 2.99!
So I didn't realize but I swatched the colors backwards lol, but anyways the color on the top is the eyelid shade (which is the bottom one on the palette). It is a really pretty champagne, golden color and extremely smooth! The middle color is the crease shade which is a really pretty bronze-y shade and the bottom is the browbone color which is a soft creamy ivory! All of these colors are not swatched on any primer and are only swatched once! They all blend beautifully and I hope you check out this palette!


I'm Getting Sunburned
At first glance at this palette in the store and you might put it back because of what they tell you to use as the browbone color. I for one would never use that as my brow color! But it is really an awesome palette, It again retails for 2.99!
Again this palette would be great to travel with and add in an extra pop of color sometimes (but not to the brow bone!) You can create a colorful look with this and even a neutral look! Very versatile.
Here I have the colors swatched! (Again backwards, I just now realized) The top is the really pretty metallic gold shade! I LOVE this color and it is so pretty.. Now when you swatch your finger in this one it doesn't feel velvety but it feels smooth and the color pay off is great! The middle shade or the crease color is a really pretty dark brown with hints of gold shimmer through out it! The bottom color is the browbone and it is a really pretty frosted lilac color. Now personally for me I would use it all over the lid or on my lower lashline for a pop of color! Also for the crease and browbone color they are both very smooth!


Don't Steal My Thunder
Basically this palette is your typical smokey eye palette! This again retails for 2.99. I love how sleek the packaging is and how compact so it makes it easy to travel with!
Now the one thing I did notice about this one is that the brow color has some fall out issues so just be weary of that, I'm not sure if it is like that with all of them or just mine!
Here are all the colors swatched. The top color is a really pretty silver color. Now when you go to swatch this you aren't going to get a smooth texture but more like a soft touch, it feels like the metallic gold from the I'm Getting Sunburned palette. The middle color is the crease shade and it is a smooth black with little bits of silver shimmer throughout and the bottom one is the white brow bone color, which is kind of a rough texture but has great color pay off!

Overall I LOVE these palettes! They are all mostly smooth and pigmented. They only cost 2.99! You can easily travel with this and you still won't take up a much space as a Naked palette and you are only spending under 10.00! I really do recommend these and I hope you try them out!

If you have tried these out or are going to let me know in the comments down below!

Also please check out my friend Casey's channel where she will show you affordable cheek items! 

The Links:

Tuesday, June 11, 2013

The Good and Bad Series: Nail Art Edition 1

Hey guys so I thought it would be a good idea to give you my initial thoughts on a lot of the nail art striping polishes out there on the market! There are a ton of them and well some of them are not that great! Here I will be sharing with you the price, color choices and what I think of them. I will be posting a video on my YouTube channel that you can check out within a couple of days! I will do an update post for that if interested in the that video. 

Okay so starting off on a good note! I am going to begin with the brand Sinful Colors. These are so amazing and affordable and they have lots of colors! They are extremely pigmented and the striping brush is perfect!  I love this brand, I found mine at Walgreens and recently spotted them at Target. They are 1.99 each and you get 0.25 fl. oz.
 Ok so in the above picture are the sinful colors nail art bottles. I don't know about you guys but I love the packaging it reminds me a lot of Julep's packaging its so cute and sleek, I love it!
Now for this picture I wanted to show you the brushes, as you can tell they aren't too skinny and or wide and practically perfect! Plus they aren't too short either or too long they are just seriously perfect! 
Above are all of the Sinful Colors Nail Art polishes. Now I want you to keep in mind that these are all swatched on a white base because that is all I had but they are super opaque even when not place on a white base! If you are wondering why the purple/violet color is so thick it is because I had to switch it to a regular nail polish brush because I accidentally left the striping brush out and it dried and got hard. :/ but oh well i will manage! 

On to the next:
Kiss Nail Art Brushes these aren't very good but they do work. For me they really aren't all that opaque and they have a really funky smell to them. The only one that I care for is the silver one because it isn't really meant to be opaque since it is a glitter. Now these I have found pretty much everywhere and they sell for about 6.99-7.99. They also come in sets of 3. 
The packaging on these are okay nothing spectacular and well you see there that I only have 5 instead of 6, well I am not 100% sure where my white one went, for all I know it could be in the trash. But oh well not a loss.
Now as you can see here is the striper brush and it is a little bit short for me and the brush is a little bit wider as well. So I didn't love that about it, but it will get the job done if you are careful with it.
Here they all are swatched above, now remember again they are on a white base! I can tell you that the green and the navy are not pigmented at all as well as the pink, they need at least  3 coats to show up like that on your nail!

The next brand I am going to talk about it is L.A. Colors Art Deco nail art polishes. These were actually shocking and surprisingly pigmented but they aren't very good for using as stripers. You will see why here in a couple pictures. I believe that I have seen these in CVS before and I am sure other places as well. I think they sell anywhere from 1.49 to 1.99.
The packaging is okay nothing special but it does look like its on the cheap side, unfortunately.
Okay so as you can probably tell is that the brush is really really thick and it way too long. Also the product is super thick and hard to apply because of that! Also the pigmentation varies on everything which you will see here momentarily. It also has a weird smell to it. So not a huge fan but I can make them work for something.
Okay so as you can tell the purple/blue glitter isn't opaque at all and neither is the green but when you see the red it is extremely opaque! So the formulas are quite weird with these.

Okay next:
Island Girl Nail Stripers
I picked these up in hawaii last year so you can only really find them online or at an ABC Store if your in hawaii. I really do like these stripers because they also have a pen applicator which is neat! Now these are all glitters so they are not meant to be opaque.
I think the packaging is adorable! Also if you are wondering why they are kind of all July 4th inspired. Well I am not really sure , but I was there in July and that is why I bought them! But this set of 4 was around 11.00 I believe! So I think it is well worth the money.
Now here I am showing you the brush as well as the pen tip! The product comes out of the pen tip perfectly and the nail brush is again just the right size.
Now like I said previously they are glitters and aren't meant to be opaque they are quiet nicely pigmented though for being glitters and they dry super fast!

Okay moving on to another bad one for me anyways is the Sally Hansen Nail Art Pen. They can be found pretty much everywhere and they cost about 7.99. For the tips they are really hard and it is really hard for the product to even come out of the pen.
Although the packaging is super cute  I just can't find it in myself to LOVE these products. But the packaging is very basic and nothing special.
Now this is what the applicator looks like, just a typical looking felt tip pen except it is extremely hard. You need to make sure that your nail polish is 100% dry otherwise you will ruin it. You have to press down on the tip to get the polish to actually flow down to the tip and that gets messy. They do dry quickly which is good but still not worth it to me.
Here are all the colors swatched. They have a huge variety of colors but again just not very easy to use. Unless you are fantastic at nail art and I for one am not.

Now I am going to talk about Nail Candy Pen. I really really like these too! They would be great to travel with and they do have a nice quality to them. You can purchase these at www.nailcandypen.com now on the website the colors are not very true! So be careful of that. They sell for about 10.00 each.
So here they are they are double ended and the colors at least coordinate! Which I think is perfect. Just super cute packaging as well.
As you can tell from this picture it has a regular nail polish brush and a nail art pen! How fun, the polish comes out of the tip of the pen very easily and the nail brush is just the right size!
Here are the colors swatched again on a white base but still they are very opaque with just one coat for the yellow and the blue! I really love both of these.

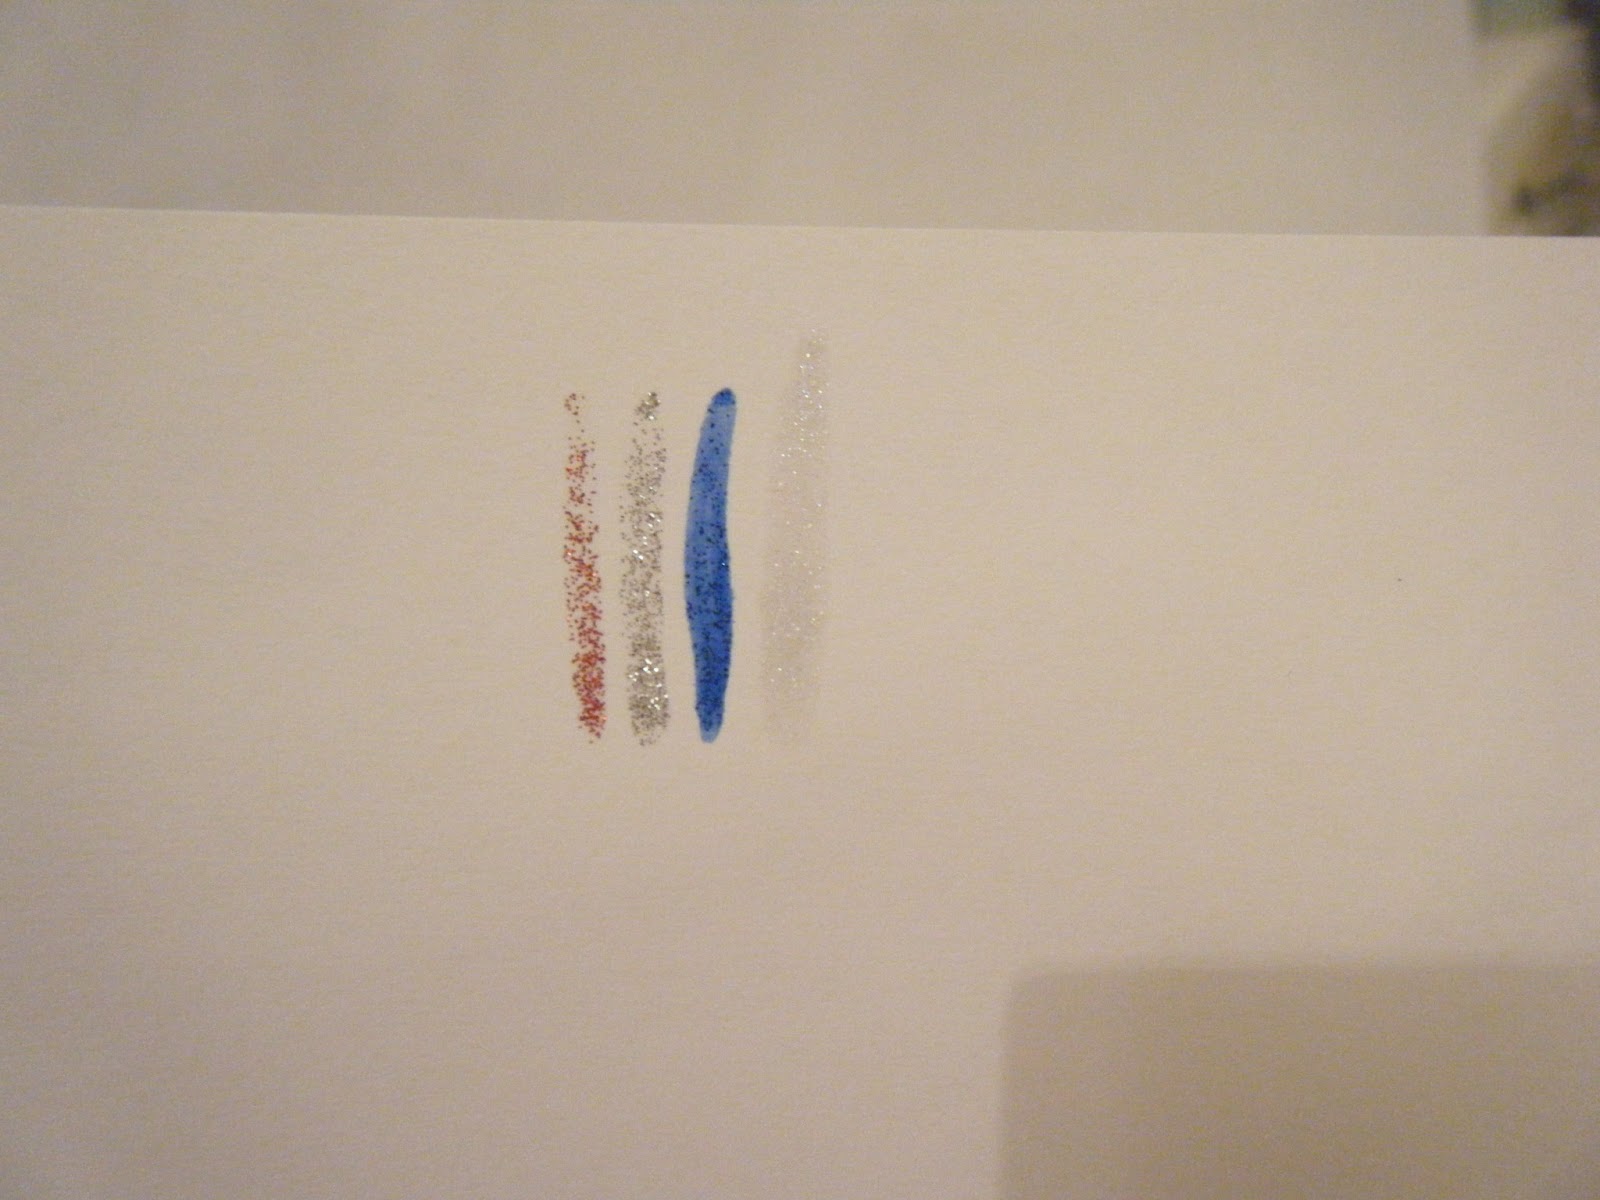
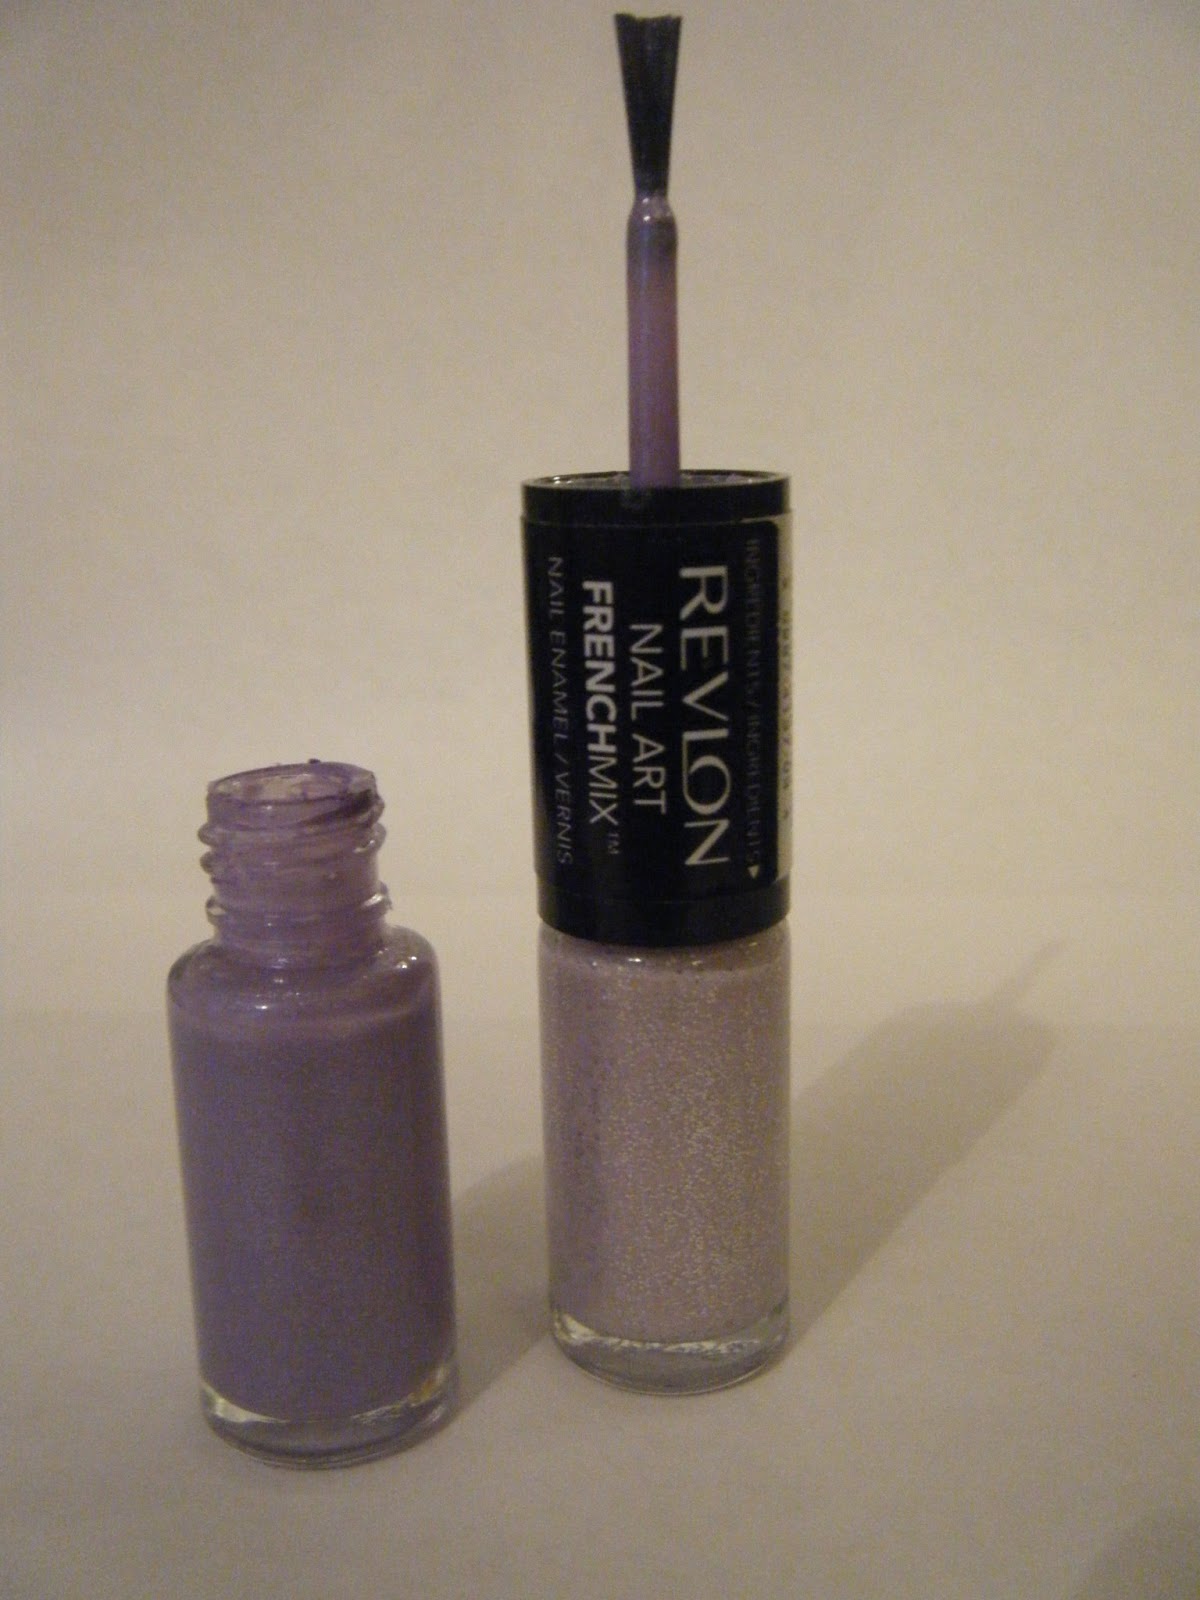
Revlon French Mix Nail Art, I like these but not what they are intended for so it is okay but I am mostly complaining because it doesn't work for what it is advertised as! These retail for about 7.99 and I have seen them at Ulta and Target and Walgreens.
 I really do like the packaging it is nice and sleek but again I want to complain because they are not opaque and it just doesn't work! :/ But they are good for traveling.
The brush is a regular sized brush not to small or to large, practically perfect! 
Now this is where it starts to get bad. Now they look okay here but they are on a white base. If you were to put this on your nice natural nail, just NO. It takes at least 3 coats for them to even be opaque! 

Now I wanted to leave this blog off on a good note and that would be with the product CM Nail Art. What an amazing product that I actually discovered through a Gel Nail Art Kit! Which I am going to be talking about in another post or video (not sure yet). You can get these throughout certain places online for about 2.49 but get more info here > www.lechatnails.com
Very typical packaging and the brush is literally perfect and there is no dry time!! 
Here is the swatch and very opaque! I definitely recommend these! :)

I hope you enjoyed this post! Please check out all the links down below and have an amazing day!
Emily

MY LINKS:
YouTube Video > http://youtu.be/EnyNWQ9rlX4