Showing posts with label Revlon. Show all posts

Friday, March 20, 2015

3-in-1 Review of Garnier, MAC & Revlon!

Hey guys it has been awhile since I have posted a video or even a blog! Which is just so crazy but if you want to see more new and exciting updates about me watch my new video.  LINK HERE

                So first things first I am going to talk about the Revlon Colorstay Concealer in 02 Light. Which I do have to say is a little to dark for me but I made it work. This shade has a yellow undertone to it and is full coverage. This product does crease under the eyes but a little setting powder wont let that happen! I love using this as a highlighting product to make you look more awake. I love the formulation and how it blends out like a dream! I would use a sponge to blend this out underneath my eyes in a patting motion and to cover blemishes I applied and blended it out the same way. It covers up redness wonderfully. It is a very good product but there aren’t very many shades in the line. PUT AMAZON LINK HERE. This retails for $8.99 on Amazon.


                For the Garnier Nutrisse Moisture Rescue for Normal/Combo skin, is a really great moisturizer for teens, pre-teens or really anyone new to the skincare world. I really recommend this because it absorbs quickly. If you have dry patches that aren’t noticeable to you then this is perfect. It hydrates just enough, but it doesn’t make you look oily. This is actually the second bottle I have went through. I like the fact that it is a gel formula and that it is transparent because you have really thick foundations that just need to be a little more on the liquid side you can just add in a little of this and it just makes it to the consistency you need and doesn’t change the shade of the foundation. It smells like cucumber and aloe which is nice and soothing and I love the cooling effect it gives me in the morning.  WALMART LINK HERE. This retails for $6.79 at Walmart.

                Okay last but not least is the amazing MAC Penultimate Eyeliner. Now in the video I said that this retailed for $19.00, well it went up (but only a dollar) so it is now $20.00. Which is still good for a MAC product. I really love this eyeliner because like I said in my video, it is 100% FOOL-PROOF! I mean if you cant achieve the wing eyeliner (which neither can I ) you NEED this in your life. This is going to save you time and frustration. You will definitely get your perfect wing on the first try, on both eyes. I use this every single day and I love it! MAC LINK HERE.


                What do you want me to review next? Leave it in the comments here or on my video which is à  LINK TO VID HERE

Friday, November 14, 2014

Updated Foundation Routine!! (Drugstore)

Hey guys so before I get started I just wanted to say HELLO again haha...I know it has been awhile actually almost a year before I have posted on here but I plan on posting more frequently about life, beauty and what not. So anyways without further adue here is my updated drugstore foundation routine!!


So first thing I like to do is apply my moisturizer and I am in love with this product it is the Garnier Nutrisse Moisture Rescue Refreshing Gel Cream for Normal/Combo skin. This retails for 5.99 and you can get it HERE. I apply this all over my face and then I let that sit and absorb into my skin which literally takes seconds and I just bought my second jar!
^ OBSESSED with this ^

Next I apply my concealer which is the Revlon Colorstay Concealer. This product retails for 9.59 and you can pick it up HERE. I use it in the sahde 02 Light. This is the first time I have ever used this product and so far I am enjoying it, but I can't tell you all of my thoughts on it just yet. Be on the lookout for the review. But I apply this to any redness I might have on my face which is currently my T-zone. I blend that all in with a beauty blender ( which mine is a knockoff but I love it) 
^ Good Coverage ^
Now time for my foundation I am currently using Covergirl Outlast Stay Fabulous 3 in 1 and I am in the shade Classic Ivory. This retails for 9.99 and you can purchase it HERE. This is my second bottle of this foundation but I kind of took a break from it and I definitely missed it! This has medium to full coverage and I will be doing a more indepth review of this product in a seperate blogpost probably coming out sometime this week. But anyways I will apply this anywhere that I feel needs more coverage and my cheeks because I don't have any redness on my cheeks and I will either blend that out with my beauty blender or I will blend it out with a Sonia Kashuk Buffing Brush (but that hasn't been my go to lately.)
^ Full Coverage ^

Then I go under my eyes with that same concealer again and I tap it out with my finger and then my beauty blender!

Now to set everything so it last all day!! I use the Loreal Paris True Match Naturale Mattifying Mineral Finish Powder. I am not over the moon about this product but it's getting the job done. Literally I went through my makeup collection and I found this and thought I would use it up. I like it and I don't if you would like an indepth review just let me know in the comments!! This product retails for 10.00 and you can purchase it HERE. I just tap that into my face with a large powder brush and I mostly put it on my T-zone and under my eyes.
^ Okay ^

That is pretty much it for my foundation routine, drugstore edition! I am currently listening to blank space by TSwift which is suprisngly good haha!! Anyways if you have any questions about anything here let me know in the comments! Love ya and I hope you have a great weekend loves!! <3 Emily


Monday, June 24, 2013

NOTW

Ok so thought I would show you what my nails have looked like for the past couple of days and what I'm currently wearing. :) 

This is what I wore for about a week or so, I just love this combination! 


On my thumb and middle fingers I wore Orlys - Fancy Fuchsia, on my index and pinky I wore Orlys - Shine and on my ring finger was Ciate - Strawberry Milkshake. (Normally I use Revlons - Lingerie Pink) 

Currently I am wearing :


On my thumb and middle finger I am wearing Revlons - Posh, on my index and pinky I'm wearing Revlons - Jaded and on my ring finger I am wearing Revlons - sassy. As for the sparkly shade over top of posh I'm wearing Orlys- Mermaids Tale :) 

It's a short post but I just thought I'd share it with you! :) 

Tuesday, June 11, 2013

The Good and Bad Series: Nail Art Edition 1

Hey guys so I thought it would be a good idea to give you my initial thoughts on a lot of the nail art striping polishes out there on the market! There are a ton of them and well some of them are not that great! Here I will be sharing with you the price, color choices and what I think of them. I will be posting a video on my YouTube channel that you can check out within a couple of days! I will do an update post for that if interested in the that video. 

Okay so starting off on a good note! I am going to begin with the brand Sinful Colors. These are so amazing and affordable and they have lots of colors! They are extremely pigmented and the striping brush is perfect!  I love this brand, I found mine at Walgreens and recently spotted them at Target. They are 1.99 each and you get 0.25 fl. oz.
 Ok so in the above picture are the sinful colors nail art bottles. I don't know about you guys but I love the packaging it reminds me a lot of Julep's packaging its so cute and sleek, I love it!
Now for this picture I wanted to show you the brushes, as you can tell they aren't too skinny and or wide and practically perfect! Plus they aren't too short either or too long they are just seriously perfect! 
Above are all of the Sinful Colors Nail Art polishes. Now I want you to keep in mind that these are all swatched on a white base because that is all I had but they are super opaque even when not place on a white base! If you are wondering why the purple/violet color is so thick it is because I had to switch it to a regular nail polish brush because I accidentally left the striping brush out and it dried and got hard. :/ but oh well i will manage! 

On to the next:
Kiss Nail Art Brushes these aren't very good but they do work. For me they really aren't all that opaque and they have a really funky smell to them. The only one that I care for is the silver one because it isn't really meant to be opaque since it is a glitter. Now these I have found pretty much everywhere and they sell for about 6.99-7.99. They also come in sets of 3. 
The packaging on these are okay nothing spectacular and well you see there that I only have 5 instead of 6, well I am not 100% sure where my white one went, for all I know it could be in the trash. But oh well not a loss.
Now as you can see here is the striper brush and it is a little bit short for me and the brush is a little bit wider as well. So I didn't love that about it, but it will get the job done if you are careful with it.
Here they all are swatched above, now remember again they are on a white base! I can tell you that the green and the navy are not pigmented at all as well as the pink, they need at least  3 coats to show up like that on your nail!

The next brand I am going to talk about it is L.A. Colors Art Deco nail art polishes. These were actually shocking and surprisingly pigmented but they aren't very good for using as stripers. You will see why here in a couple pictures. I believe that I have seen these in CVS before and I am sure other places as well. I think they sell anywhere from 1.49 to 1.99.
The packaging is okay nothing special but it does look like its on the cheap side, unfortunately.
Okay so as you can probably tell is that the brush is really really thick and it way too long. Also the product is super thick and hard to apply because of that! Also the pigmentation varies on everything which you will see here momentarily. It also has a weird smell to it. So not a huge fan but I can make them work for something.
Okay so as you can tell the purple/blue glitter isn't opaque at all and neither is the green but when you see the red it is extremely opaque! So the formulas are quite weird with these.

Okay next:
Island Girl Nail Stripers
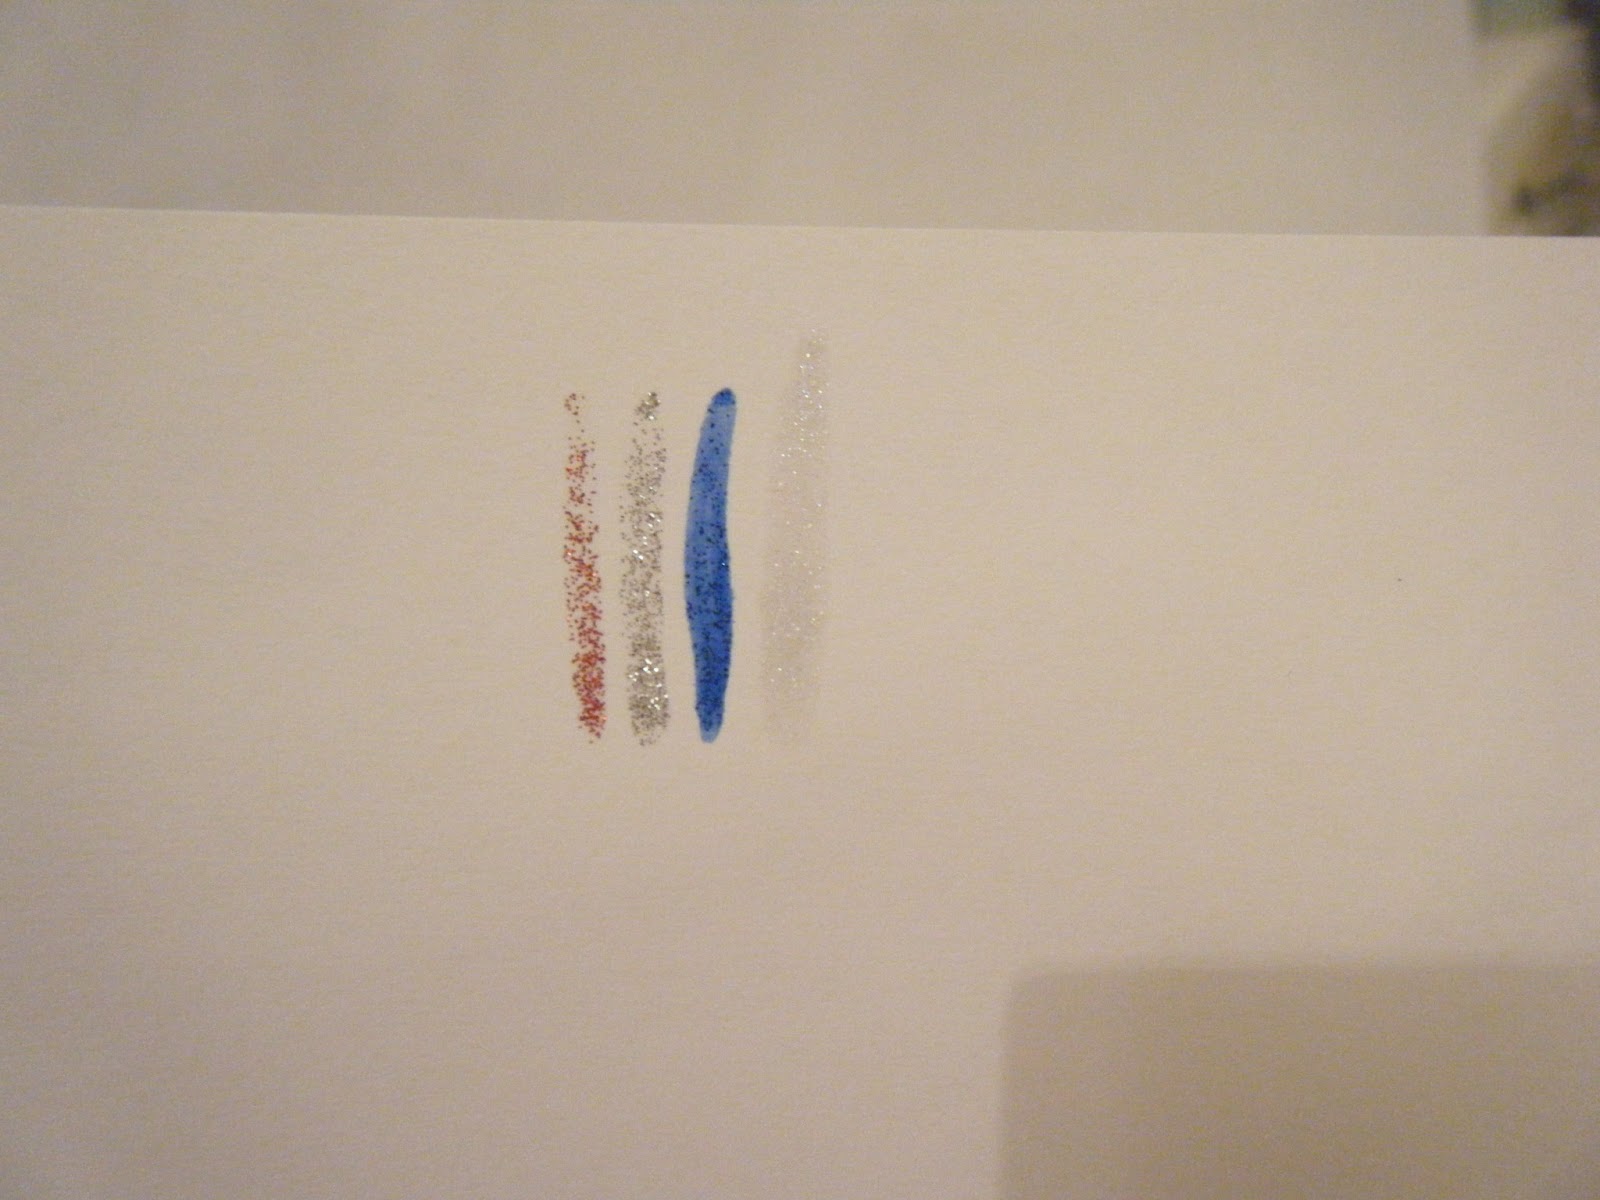
I picked these up in hawaii last year so you can only really find them online or at an ABC Store if your in hawaii. I really do like these stripers because they also have a pen applicator which is neat! Now these are all glitters so they are not meant to be opaque.
I think the packaging is adorable! Also if you are wondering why they are kind of all July 4th inspired. Well I am not really sure , but I was there in July and that is why I bought them! But this set of 4 was around 11.00 I believe! So I think it is well worth the money.
Now here I am showing you the brush as well as the pen tip! The product comes out of the pen tip perfectly and the nail brush is again just the right size.
Now like I said previously they are glitters and aren't meant to be opaque they are quiet nicely pigmented though for being glitters and they dry super fast!

Okay moving on to another bad one for me anyways is the Sally Hansen Nail Art Pen. They can be found pretty much everywhere and they cost about 7.99. For the tips they are really hard and it is really hard for the product to even come out of the pen.
Although the packaging is super cute  I just can't find it in myself to LOVE these products. But the packaging is very basic and nothing special.
Now this is what the applicator looks like, just a typical looking felt tip pen except it is extremely hard. You need to make sure that your nail polish is 100% dry otherwise you will ruin it. You have to press down on the tip to get the polish to actually flow down to the tip and that gets messy. They do dry quickly which is good but still not worth it to me.
Here are all the colors swatched. They have a huge variety of colors but again just not very easy to use. Unless you are fantastic at nail art and I for one am not.

Now I am going to talk about Nail Candy Pen. I really really like these too! They would be great to travel with and they do have a nice quality to them. You can purchase these at www.nailcandypen.com now on the website the colors are not very true! So be careful of that. They sell for about 10.00 each.
So here they are they are double ended and the colors at least coordinate! Which I think is perfect. Just super cute packaging as well.
As you can tell from this picture it has a regular nail polish brush and a nail art pen! How fun, the polish comes out of the tip of the pen very easily and the nail brush is just the right size!
Here are the colors swatched again on a white base but still they are very opaque with just one coat for the yellow and the blue! I really love both of these.

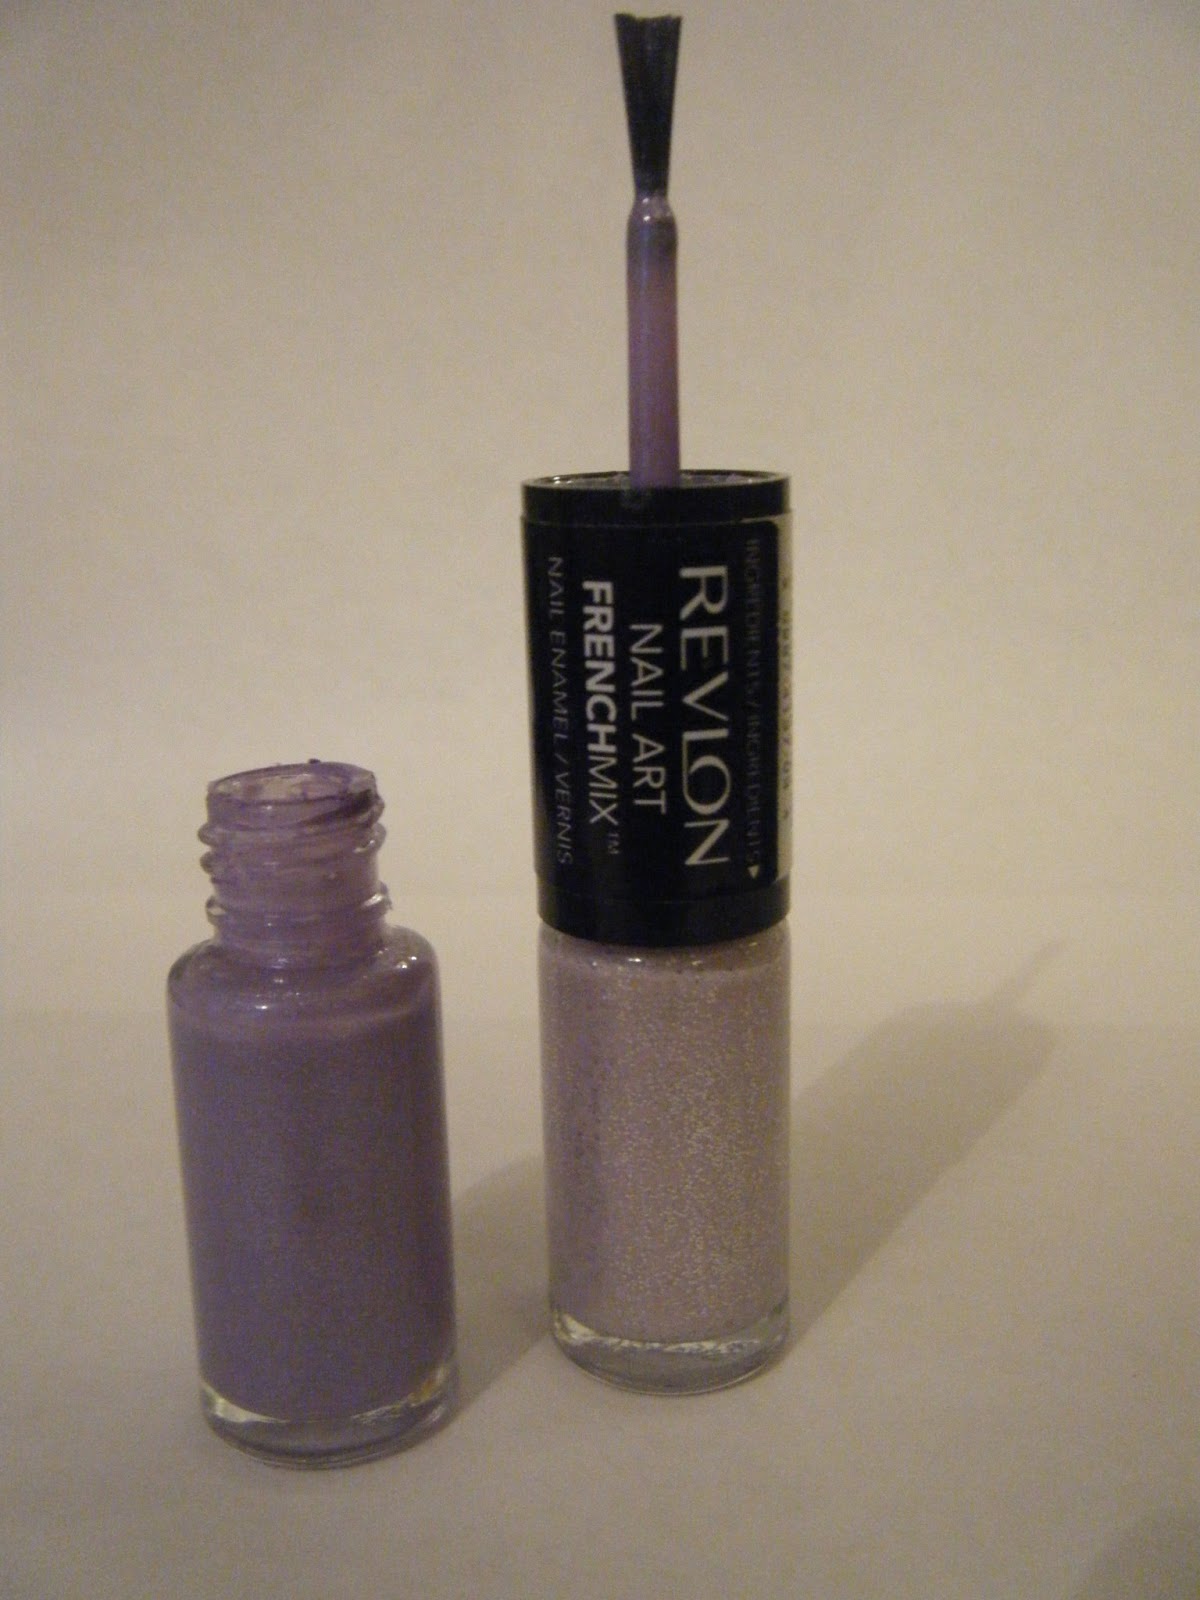
Revlon French Mix Nail Art, I like these but not what they are intended for so it is okay but I am mostly complaining because it doesn't work for what it is advertised as! These retail for about 7.99 and I have seen them at Ulta and Target and Walgreens.
 I really do like the packaging it is nice and sleek but again I want to complain because they are not opaque and it just doesn't work! :/ But they are good for traveling.
The brush is a regular sized brush not to small or to large, practically perfect! 
Now this is where it starts to get bad. Now they look okay here but they are on a white base. If you were to put this on your nice natural nail, just NO. It takes at least 3 coats for them to even be opaque! 

Now I wanted to leave this blog off on a good note and that would be with the product CM Nail Art. What an amazing product that I actually discovered through a Gel Nail Art Kit! Which I am going to be talking about in another post or video (not sure yet). You can get these throughout certain places online for about 2.49 but get more info here > www.lechatnails.com
Very typical packaging and the brush is literally perfect and there is no dry time!! 
Here is the swatch and very opaque! I definitely recommend these! :)

I hope you enjoyed this post! Please check out all the links down below and have an amazing day!
Emily

MY LINKS:
YouTube Video > http://youtu.be/EnyNWQ9rlX4


Friday, May 31, 2013

Very First Nail Tutorial EVER! 3-in-1 Easy Polka Dot Designs

Hello everyone, I just recently filmed my very first nail tutorial! If you would like to request anymore please let me know in the comments on here or on the video! It would mean so much to me and also please subscribe, it helps out a lot, so I can keep bringing you awesome videos! :) Please enjoy and I will talk to you guys soon!!

NAIL ART TUTORIAL LINK

I just want to thank HopeLoveandCandy for requesting this video!!

Also thank you to my mom for letting me use her nails in the tutorial!

As always have an awesome day and I will talk to you guys later!

Emily aka XxweluvmakeupxX aka Emilyle96

Monday, May 6, 2013

A List of a Few Foundations/Primers that are mostly silicone based and some water based. Enjoy!

HIGH END
Quercetin & Anti-ageing foundation----------------- Korres----------------------------------- Silicone
Invisible Cover Foundation-------------------------- Makeup Forever HD--------------------- Silicone
Mat Velvet + Matifying Foundation------------------ Makeup Forever HD--------------------- Silicone
Amazonian Clay 12 hr Full Coverage Foundation---- Tarte------------------------------------- Silicone
Naked Skin Weightless Ultra Definition Foundation-- Urban Decay-----------------------------  Silicone
Le Teint Touche Eclat Illuminating Foundation------- Yves Saint Laurent----------------------- Silicone
Hello Flawless Oxygen Wow Liquid Foundation----- Benefit------------------------------------  Silicone
Silk Crème Foundation------------------------------ Laura Mercier----------------------------  Silicone
High Definition Healthy FX Foundation-------------- Smashbox-------------------------------- Silicone
Lock it Tattoo -------------------------------------- Kat Von D------------------------------- Silicone
Quercetin & Oak Anti-Ageing Primer--------------- Korres----------------------------------- Water
The Porefessional----------------------------------- Benefit------------------------------------  Silicone
HD Microperfecting Primer-------------------------- Makeup Forever HD--------------------- Silicone
Prime Time------------------------------------------ Bare Minerals---------------------------- Silicone
Photo Finish Foundation Primer--------------------- Smashbox-------------------------------- 60% water
Foundation Primer Hydrating------------------------ Laura Mercier----------------------------Silicone
Foundation Primer  --------------------------------- Laura Mercier----------------------------  Water
Foundation Primer Oil Free-------------------------- Laura Mercier----------------------------  Water
That Gal Brightening Face Primer-------------------- Benefit------------------------------------  Silicone
Clean Slate Poreless 12 hr Perfecting Primer--------- Tarte------------------------------------- Silicone
AquaPrime Oil Free Makeup Primer---------------- Lorac------------------------------------- Water
DRUGSTORE
L’oreal True Match Super-Blendable Makeup------- Loreal------------------------------------ Silicone
Revlon Colorstay Normal/Dry Skin------------------ Revlon------------------------------------ Silicone
 Rimmel London Lasting Finish 25 Hour Foundation- Rimmel----------------------------------- Silicone
Loreal True Match Lumi Foundation----------------- Loreal------------------------------------ Silicone
Revlon Colorstay Whipped Foundation-------------- Revlon------------------------------------ Silicone
Loreal Magic Perfecting Base----------------------- Loreal------------------------------------ Silicone
Revlon Photoready Perfecting Primer---------------- Revlon------------------------------------ Silicone


I hope this chart helped! If you have any questions just ask away!!

Emily

Sunday, March 17, 2013

Happy Saint Patricks Day! March 2013

Hey my lovelies! I am sitting here on this cold sunday afternoon, supporting green and watching Counting Cars. I thought I would show you guys what I am wearing for my makeup and nails and I might sneak in a pick of my shirt that you can get at Target! (and who doesn't love Target! lol) anyways.

I can't show you the picks because they are on my instagram. ( I might post them from my phone cause I was'nt thinking)

But here are the links:
Nails <CLICK- Revlon - Posh - cream finish kelly green! and on the tips Hello Kitty - Gold Star - fine gold glitter! Also I'm trying out my new base and top coat samples from Lumos! (Thanks Lumos!! Review coming soon)
Makeup - Eyes <CLICK - Took some colors from my Urban Decay Alice in Wonderland Palette (Chessur, Muchness, Drink Me Eat Me, Midnight Tea Party, Wonderland, Absolem and Mad Hatter) I think you could achieve the look by using the NYX Eat, Love, B Fab Palette. I used my Original Urban Decay Eyeshadow Primer, Milani True Black Eyeliner, Urban Decay Lush Lash mascara, Ulta Voluptuous Volume Mascara and NYX Jumbo Eyeshadow Pencil in Milk, NYX Crystal Liner in Champagne, MAC Glitter Liner in Lime Dandy and Bare Escentuals Glitter Mascara in Bronze.
Face - I used Revlon Colorstay Whipped foundation in Buff, NARS blush in Orgasm, Rimmel Stay Matte Powder in 003 Natural, Victoria Secret Highlighter in All or nothing.
Lips- Maybelline Baby Lips in Yummy Plummy and Sephora Lip Gloss in Marquisette.

Outfit - Skinny Jeans and black tank top from forever 21 and cute saint patricks day shirt from Target click here for the link and a black sweater from kohls.

And that my friends concludes my Saint Patricks Day look. Please let me know if you would like me to do a tutorial on the makeup because I think this look is great for the spring time as well. Comment down below if you would like me to do so.

Here are my links:
TWITTER
YOUTUBE - SUBSCRIBE
INSTAGRAM